In the last post about Xamarin Forms we’ve started to see the basic concepts on how to begin the development of a cross-Platform application. In this post we’re going to explore some basic navigation concepts and some tips to organize our solution. Also, we’ll develop a simple CrossPlatformApp that welcomes us with a main screen and a button to navigate to a new view where we can generate a random integer.
Organize our new project
We’ve just created a new Xamarin Forms Project and now we’re ready to develop yet another mobile app. If you know how to create a brand new Xamarin Forms Project you can continue reading, otherwise I suggest to read the first post (getting started) of this serie.
When I start a new Project I like to organize things to be more confortable and organized so let’s start and do it.
The Views folder
We create a new folder in the shared Project and call it Views. In this folder we’ll put all the files to create the UI (the views).
We already have a view in our Project: the MainPage.xaml. We move the file in the Views folder.
Now we move the MainPage class in the Views namespace. Besides, everytime we’ll add a new file in the Views folder the class will be created in the Views namespace as standard behavior by Visual Studio.
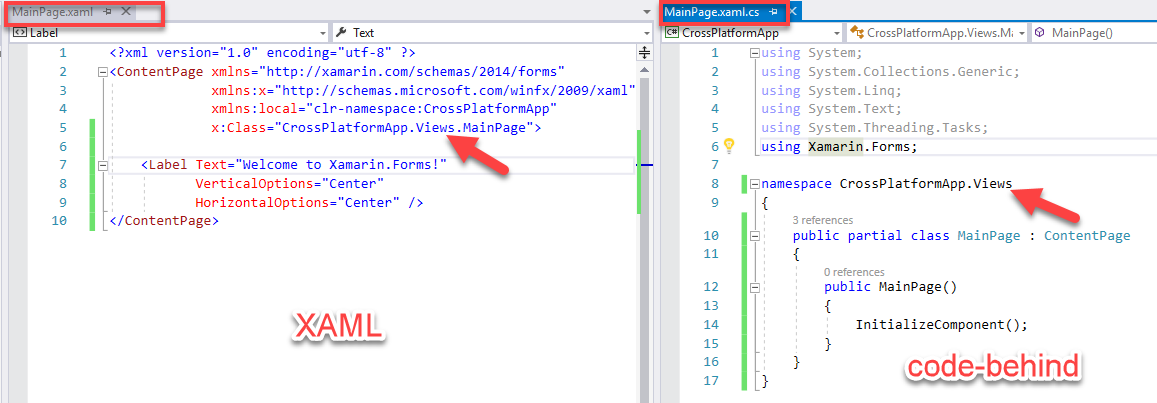
To move the MainPage class into the Views namespace we edit MainPage.xaml and MainPage.xaml.cs like this:
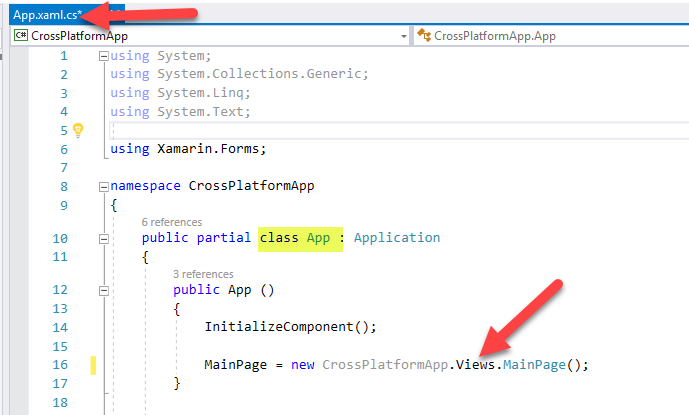
Now our Project won’t compile because the App class cannot find the MainPage class anymore. So we need to edit the App class like the following image:
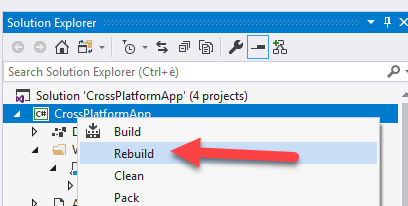
Now our soution compiles.
Setup the navigation
With navigation we mean the features available in Xamarin Forms to drive the user experience from a view to another. In this example we’re going to implement a hierarchical navigation.
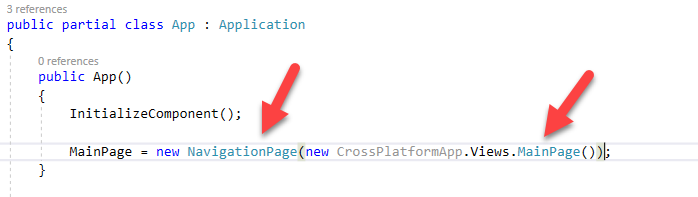
To support hierarchical navigation we create a shell for our UI where the views will be navigated. The shell is created with an instance of the NavigationPage class. So we edit the App.xaml.cs file to set the MainPage of the App as a new NavigationPage. The root of our navigation is the MainPage that is a ContentPage.
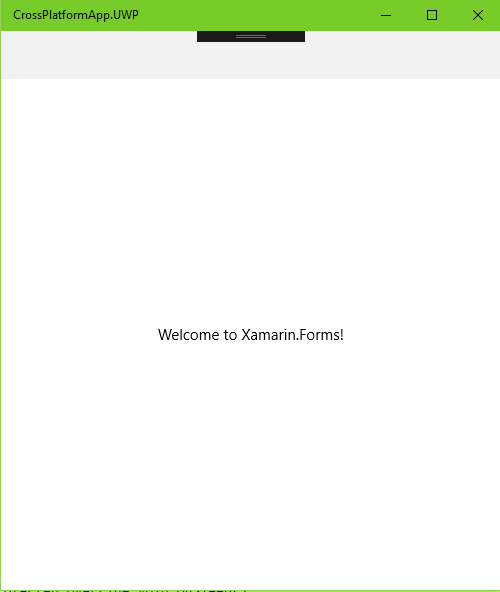
If we build and run our application we’ll see no UI differences in the app but now we’re ready to navigate from one page to another.
The CrossPlatformApp for UWP.
Let’s navigate
As we stated at the beginning of this post the app has to show to the user a button to navigate to another view. So let’s edit the XAML in the MainPage class to do this.
[code language=“XML”]
/>
Ti è piaciuto questo articolo?
Iscriviti alla newsletter per ricevere contenuti su DevOps, software engineering e team di sviluppo direttamente nella tua casella di posta.
Utilizziamo cookie tecnici (necessari) e, con il tuo consenso, cookie analitici per migliorare la tua esperienza. Puoi leggere la nostra Privacy Policy e la Cookie Policy per maggiori dettagli.
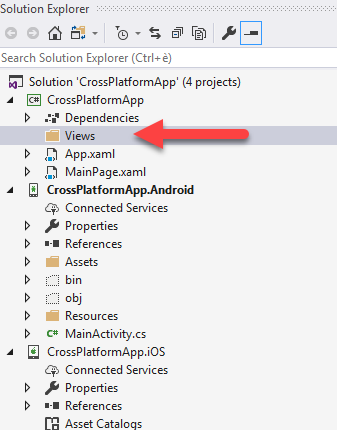 We already have a view in our Project: the MainPage.xaml. We move the file in the Views folder.
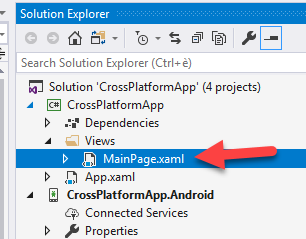 Now we move the MainPage class in the Views namespace. Besides, everytime we’ll add a new file in the Views folder the class will be created in the Views namespace as standard behavior by Visual Studio.
To move the MainPage class into the Views namespace we edit MainPage.xaml and MainPage.xaml.cs like this:
Now we move the MainPage class in the Views namespace. Besides, everytime we’ll add a new file in the Views folder the class will be created in the Views namespace as standard behavior by Visual Studio.
To move the MainPage class into the Views namespace we edit MainPage.xaml and MainPage.xaml.cs like this:
 Now our Project won’t compile because the App class cannot find the MainPage class anymore. So we need to edit the App class like the following image:
 Now our soution compiles.
 If we build and run our application we’ll see no UI differences in the app but now we’re ready to navigate from one page to another.